

Photoshop brush tool is an important tool to make our design
eye catching. Photoshop has some default brushes. But we can add as many brushes as we want. We
can add any shape as a brush. Today we will learn how to add a custom shape as
a brush.
Step 1: Take a
new document with any dimension.
Step 2: Now go to
Tool Box and select Custom Shape Tool.

Step 3: We will
find some default shapes in the option bar. To find it click on shape on the option bar.
A new tab will open. You can select any shape from here.

Step 4: If these shapes is not enough for you, you can look for
other default shapes. To do so click on the icon shown in the image.

You will find an Menu
bar like this

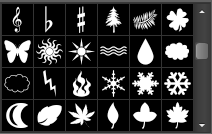
Step 5: Now
select any shape you like. I have select Butterfly
from Nature library.
Step 6:Put Foreground Color as Black.

Step 7: Now draw a butterfly on your canvas

Step 8: Now go to Edit>Define Brush Preset

Step 9: You will
get a pop up window. Here you can name your brush.

Your brush has created. Now you can use this brush selecting
from brush preset.

No comments:
Post a Comment